So testing, right? We should do it. The thing is, testing is hard, and good testing
is reaaaaaaally hard, and tbh I’m pretty bad at testing. So I end up not
testing my apps, and then I feel guilty about it, but I’ll stop you now:
you can’t run guilt on Travis. If this sounds familiar, then this blog post is for you.
I did a little song-and-dance that sets up Puppeteer*
, takes screenshots of your app (like, all the routes you care about), and
then compares them to the “golden” ones. If they match, your test passes!
Yes, it only works on Chrome. No, it’s not
actually unit testing. Yes, it’s literally just counting pixels but you know what?
It counts them in both a wide and a narrow viewport size and any testing is better
than no testing at all; fight me.
* Puppeteer is an npm library that lets you control Chrome. You know, like a puppet.
In particular, Puppeteer makes
it super easy to take screenshots (and click on things in your page). It’s
like a waaaaaaay less infuriating Selenium, but infinitely harder to spell.
This post looks long because I’ve put all the code I have so
that you can copy paste it. Skip to the good part
if you already know how to test.
Do the npm
If you want to test things with Puppeteer, you have to setup a thing for the
tests, a server that launches your site, and then Puppeteer to look
at that site. I have this in my package.json to wrangle these things:
"devDependencies": {
  "chai": "^4.1.2",
  "mocha": "^5.0.0",
  "puppeteer": "^1.0.0",
  "pixelmatch": "^4.0.2",
  "polyserve": "^0.23.0"
}
Explanation:
- I chose Mocha/Chai for testing because that’s what I’m used to. You can
literally use any other testing framework you’re comfortable with; I don’t think it matters.
Pixelmatch is the thing that diffs
two images and tells you how many pixels they differ by. It’s super awesome 🏆.Polyserve is what I use as a local
server. You can use Python or Express or whatever you cool kids use. I’ll
point out in the code where it’s Polyserve specific (literally 2 lines), and you
can sub in your favourite server there.
Set up your test
In order to tell Puppeteer to investigate your site, you need to:
- start a test suite
- that sets up a local server
- and in each test tells Puppeteer to do something.
My setup looks like this:
const puppeteer = require('puppeteer');
const expect = require('chai').expect;
const {startServer} = require('polyserve');

describe('👀 screenshots are correct', function() {
  let polyserve, browser, page;

  // This is ran when the suite starts up.
  before(async function() {
    // This is where you would substitute your python or Express server or whatever.
    polyserve = await startServer({port:4000});

    // Create the test directory if needed. This and the goldenDir
    // variables are global somewhere.
    if (!fs.existsSync(testDir)) fs.mkdirSync(testDir);

    // And its wide screen/small screen subdirectories.
    if (!fs.existsSync(`${testDir}/wide`)) fs.mkdirSync(`${testDir}/wide`);
    if (!fs.existsSync(`${testDir}/narrow`)) fs.mkdirSync(`${testDir}/narrow`);
  });

  // This is ran when the suite is done. Stop your server here.
  after((done) => polyserve.close(done));

  // This is ran before every test. It's where you start a clean browser.
  beforeEach(async function() {
    browser = await puppeteer.launch();
    page = await browser.newPage();
  });

  // This is ran after every test; clean up after your browser.
  afterEach(() => browser.close());

  // Wide screen tests!
  describe('wide screen', function() {
    beforeEach(async function() {
      return page.setViewport({width: 800, height: 600});
    });
    it('/view1', async function() {
      return takeAndCompareScreenshot(page, 'view1', 'wide');
    });
    // And your other routes, 404, etc.
  });

  // Narrow screen tests are the same, but with a different viewport.
  describe('narrow screen', function() {
    beforeEach(async function() {
      return page.setViewport({width: 375, height: 667});
    });
    it('/view1', async function() {
      return takeAndCompareScreenshot(page, 'view1', 'narrow');
    });
    // And your other routes, 404, etc.
  });
});
You can test all sort of things here, by the way. Puppeteer lets you interact
with the page (click on buttons, links, etc), so maybe you want to trigger
different UI states before you screenshot them (like narrow view but also with
the navigation drawer opened).
Filling in the blanks
All the heavy lifting (which isn’t very heavy tbh) is done in takeAndCompareScreenshot:
// - page is a reference to the Puppeteer page.
// - route is the path you're loading, which I'm using to name the file.
// - filePrefix is either "wide" or "narrow", since I'm automatically testing both.
async function takeAndCompareScreenshot(page, route, filePrefix) {
  // If you didn't specify a file, use the name of the route.
  let fileName = filePrefix + '/' + (route ? route : 'index');

  // Start the browser, go to that page, and take a screenshot.
  await page.goto(`http://127.0.0.1:4000/${route}`);
  await page.screenshot({path: `${testDir}/${fileName}.png`});

  // Test to see if it's right.
  return compareScreenshots(fileName);
}
Getting the golden screenshots
This bit is easy. Make a different test suite (just make sure you don’t run it every time you
run your tests), and run the page.goto and page.screenshot lines for all
the routes you’re testing. I recommend doing the viewport dance too, to get both the
wide and narrow screen ones for freeeeee (I am using just the viewport
size here, because that’s how my app works. Puppeteer lets yo do device emulation
and all sorts of other goodness, so just read the docs). Put all these screenshots in a place; I put mine in
a folder called test/screenshots-golden/.
The thing that does the diffing
This is the logic in compareScreenshots, and it’s basically straight
out of the Pixelmatch docs:
function compareScreenshots(fileName) {
  return new Promise((resolve, reject) => {
    const img1 = fs.createReadStream(`${testDir}/${fileName}.png`).pipe(new PNG()).on('parsed', doneReading);
    const img2 = fs.createReadStream(`${goldenDir}/${fileName}.png`).pipe(new PNG()).on('parsed', doneReading);

    let filesRead = 0;
    function doneReading() {
      // Wait until both files are read.
      if (++filesRead < 2) return;

      // The files should be the same size.
      expect(img1.width, 'image widths are the same').equal(img2.width);
      expect(img1.height, 'image heights are the same').equal(img2.height);

      // Do the visual diff.
      const diff = new PNG({width: img1.width, height: img2.height});
      const numDiffPixels = pixelmatch(
          img1.data, img2.data, diff.data, img1.width, img1.height,
          {threshold: 0.1});

      // The files should look the same.
      expect(numDiffPixels, 'number of different pixels').equal(0);
      resolve();
    }
  });
}
💯 It’s all worth it
Now, when you run your tests (mocha test/ --timeout 5000 in my case), you get
something like this:
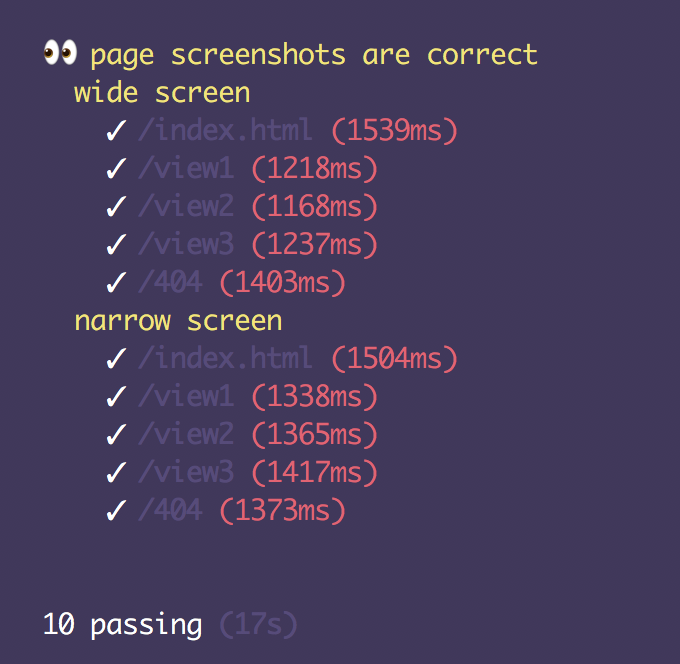
And if it fails, you get an error and the number of pixels you’re off by.
⭐️
Now go on, navigate to all your routes and test your stuff, and thank me
with a photo of your dog.